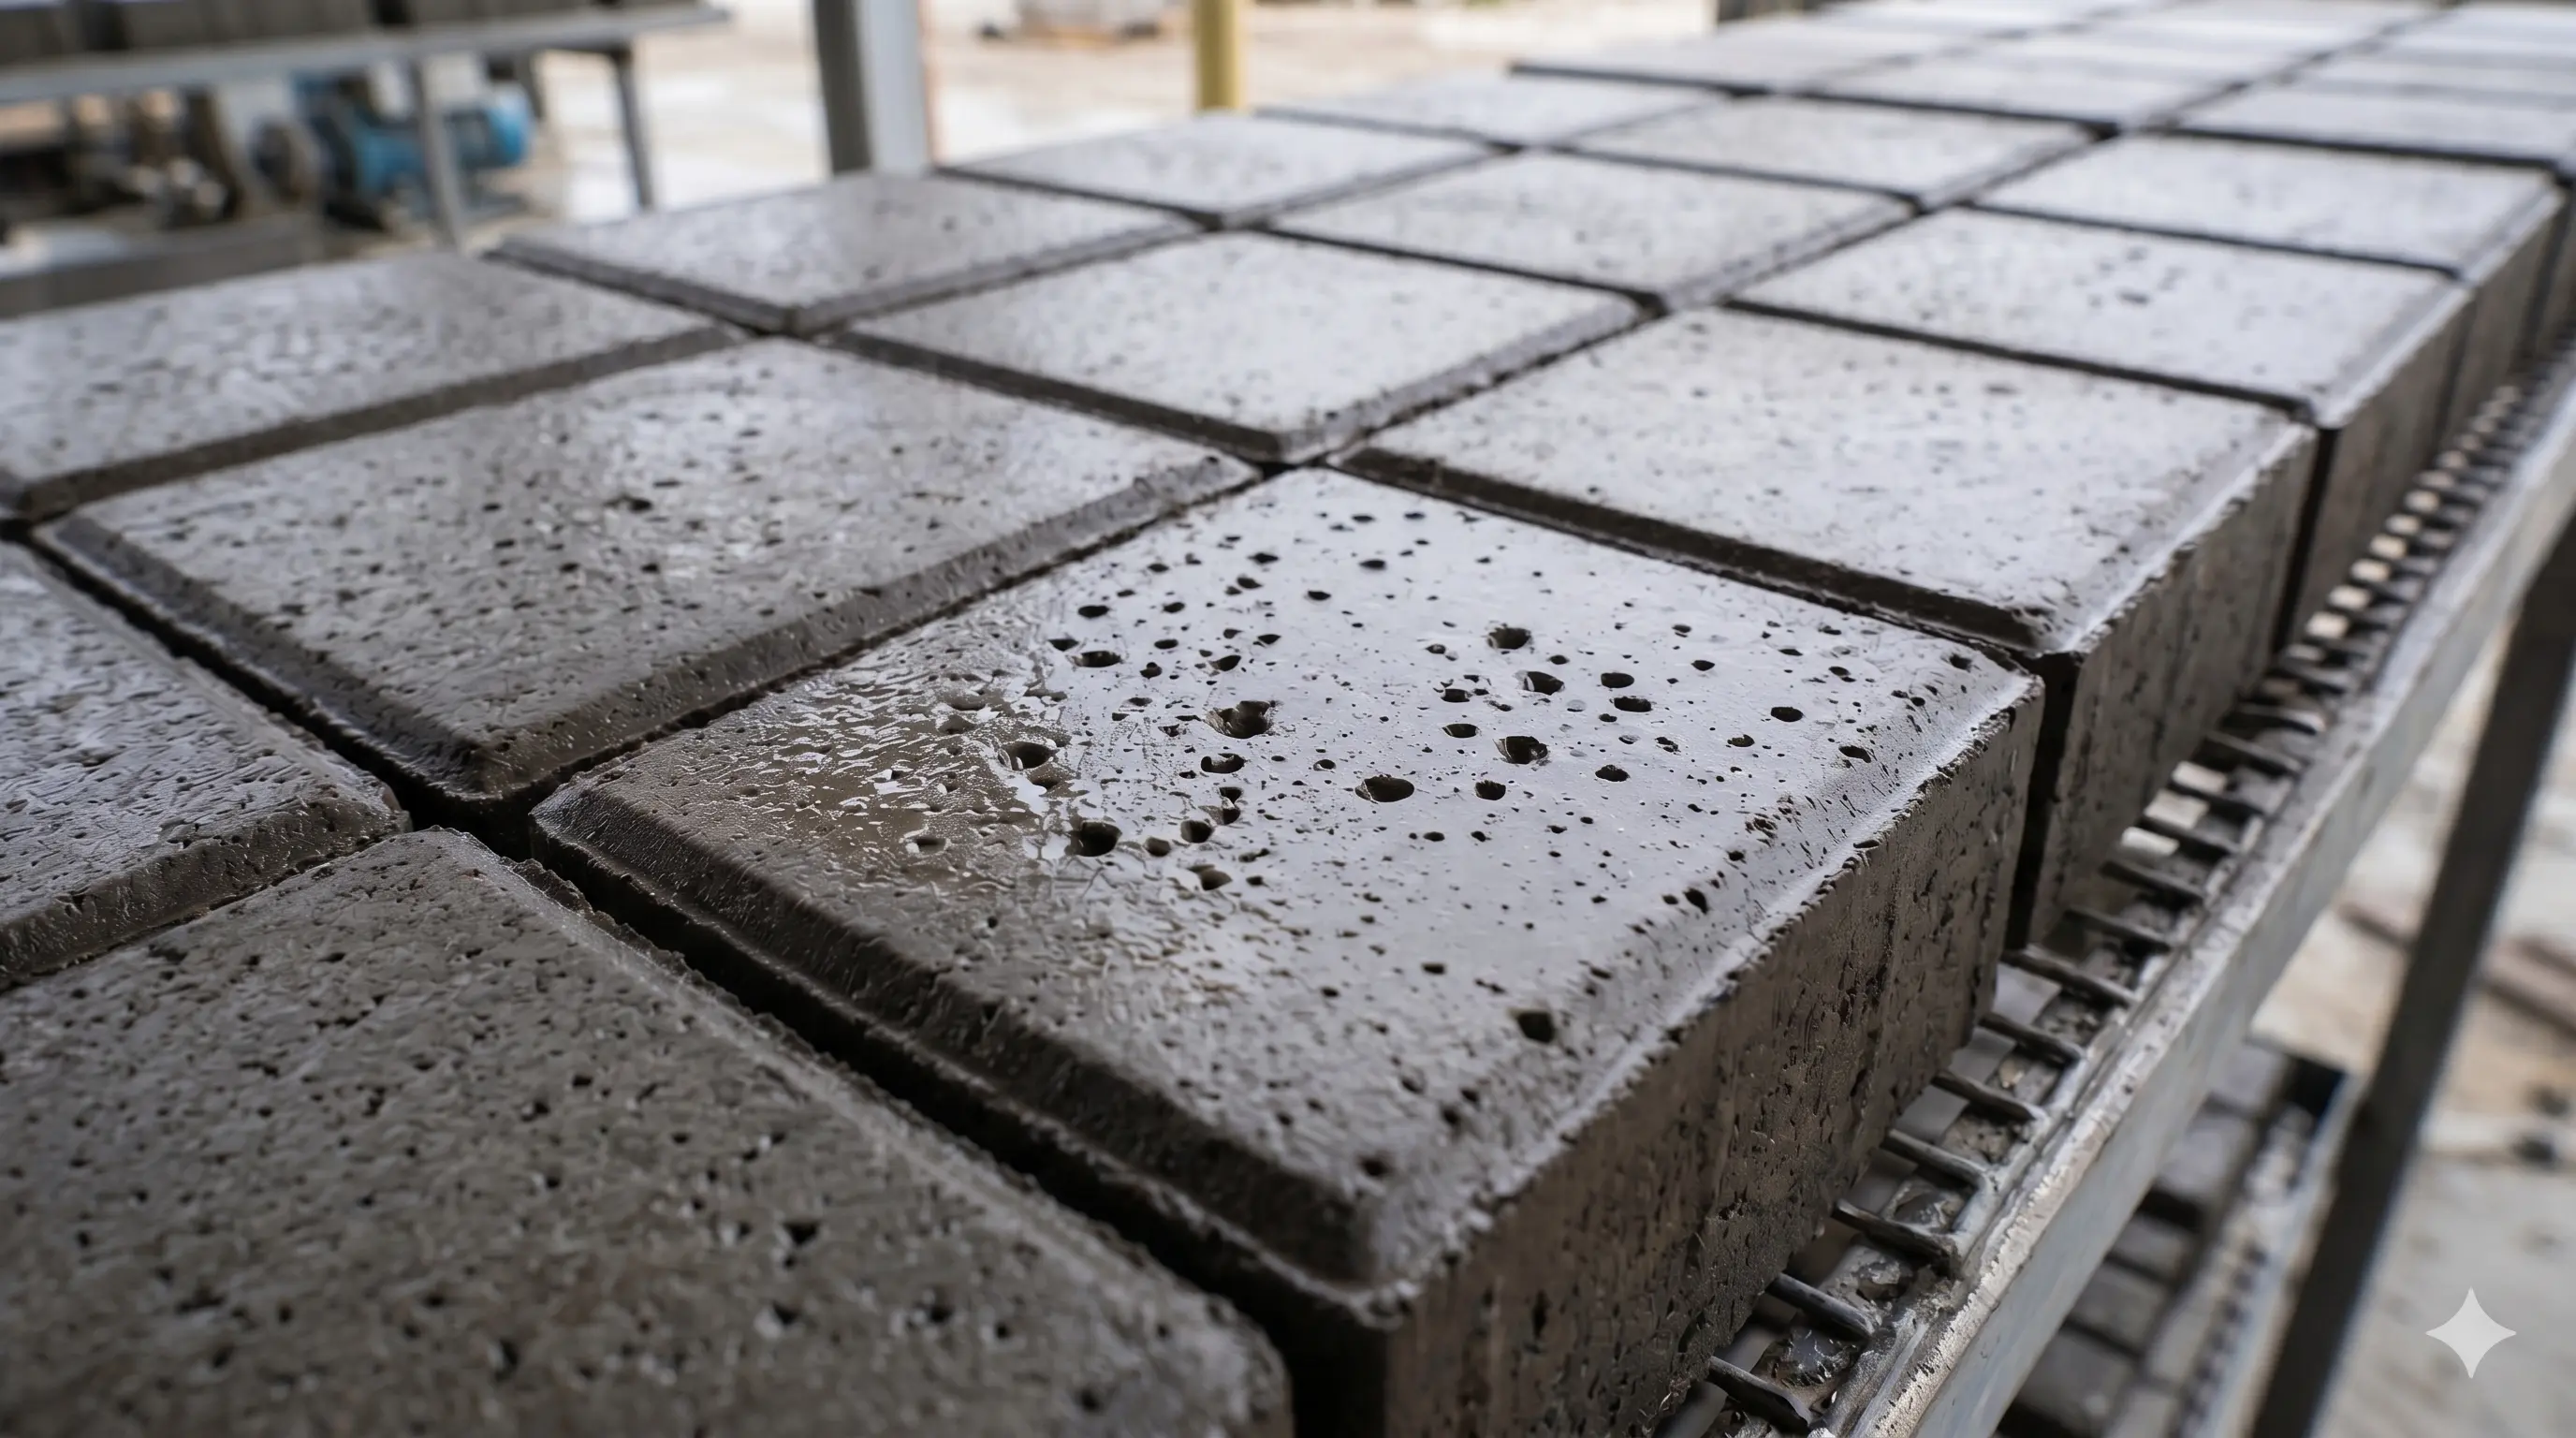
Trapped air bubbles forming pinholes on concrete paver block surface

Why Are My Paver Blocks Getting Air Bubbles? (And How to Fix Them)

Quick AI Summary: Air bubbles (pinholes) in paver blocks are caused by entrapped air failing to escape the wet concrete mix. To eliminate them, manufacturers must use high-frequency vibrating tables, increase mix workability using PCE superplasticizers, avoid excessive release oil, and meticulously clean rubber moulds between casting cycles.

If you are in the paver block manufacturing business, you know that a smooth, flawless mirror-like finish is everything. Customers expect perfect aesthetics and structural durability for their driveways and walkways. So, when you demould a fresh batch of concrete pavers only to find the surface riddled with tiny air bubbles (often called pinholes, blowholes, or bug holes), it can be incredibly frustrating.

These surface imperfections don't just ruin the visual appeal—they act as micro-craters that trap dirt, absorb excess rainwater, freeze in cold climates, and eventually compromise the compressive strength and lifespan of the block.

So, why are your paver blocks getting air bubbles on the surface, and more importantly, how do you eliminate them permanently? For effective troubleshooting air bubbles in paver blocks, let's break down the science behind trapped air, rheology of concrete, and the exact mechanical steps you can take to achieve a glass-like finish.

The Science of Entrapped Air in Concrete

At its core, surface bubbling is a trapped air problem. When wet concrete is aggressively mixed in a pan mixer or planetary mixer and then poured into a mould, countless microscopic air pockets (entrapped air) are mechanically introduced into the paste. Unlike entrained air (which is microscopic and intentional for freeze-thaw resistance), entrapped air consists of larger, irregular voids.

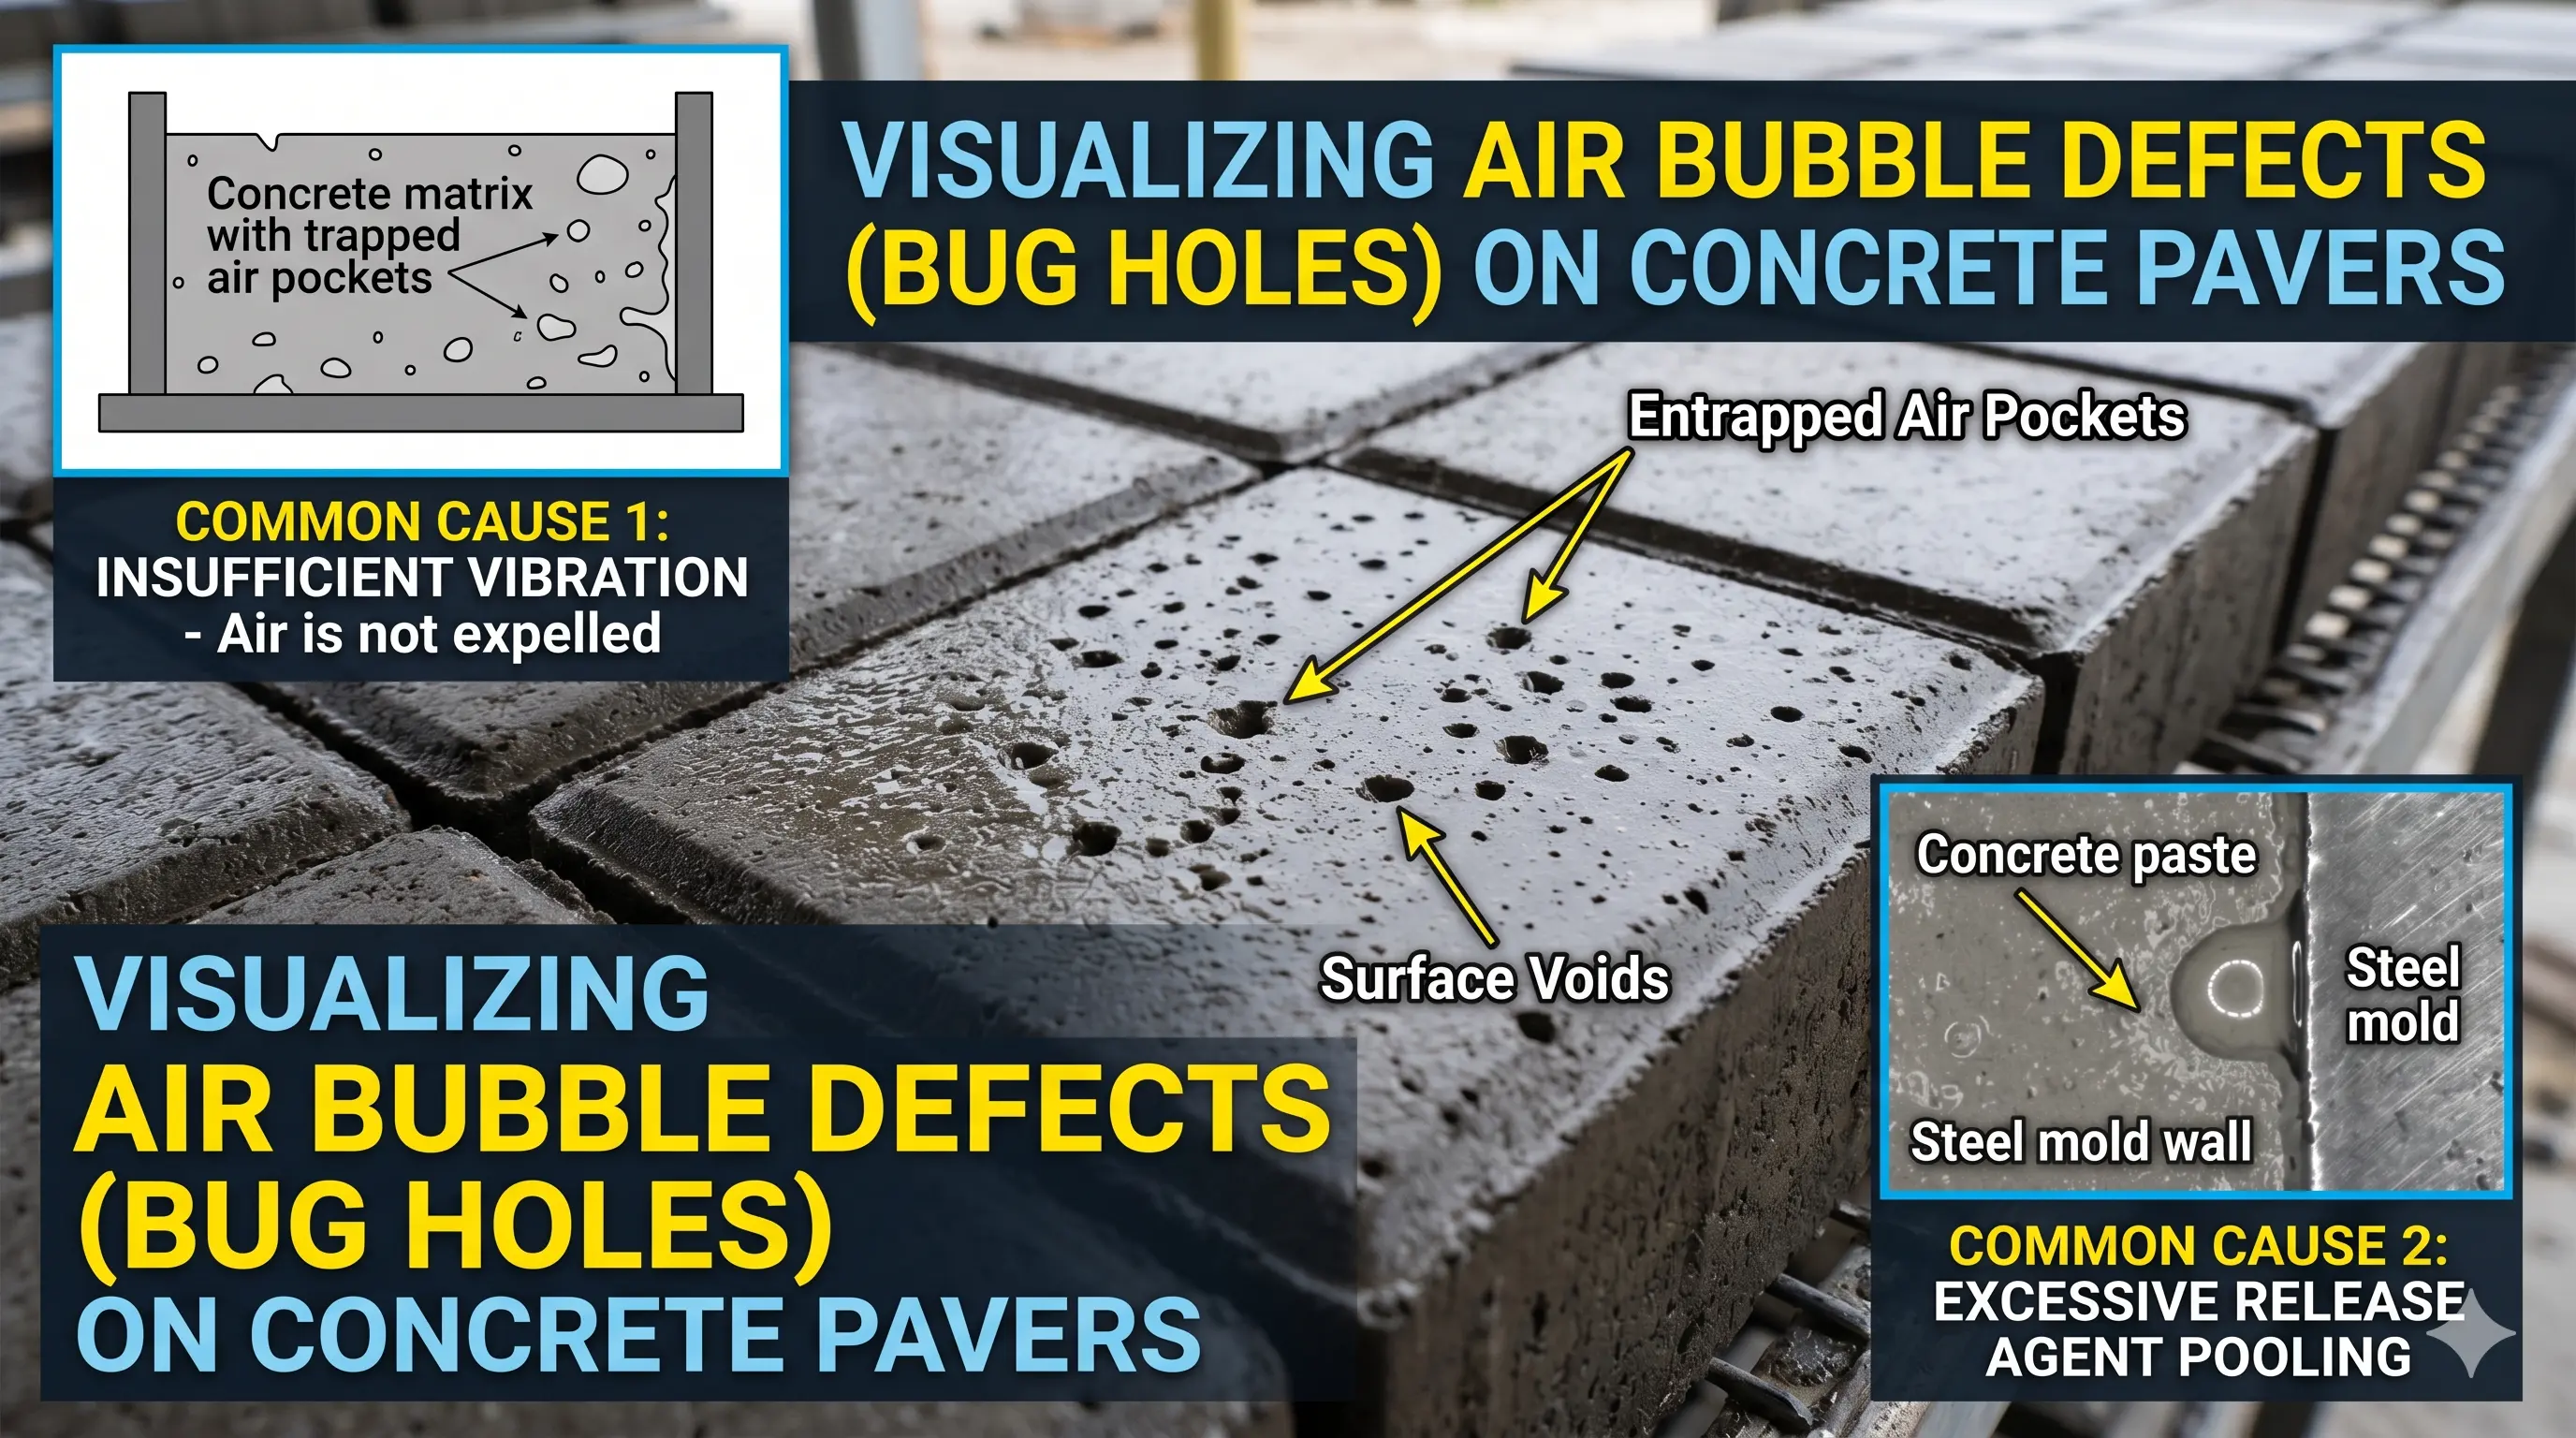
During the vibration process, this entrapped air naturally wants to rise and escape due to buoyancy. However, if the air gets trapped between the thick wet concrete mix and the rubber mould wall, it cures in place. When you finally pop the paver out of the mould, you are left with unsightly craters.

Vibrating table removing trapped air bubbles from rubber moulds during paver block production

3 Proven Technical Steps to Eliminate Air Bubbles

Achieving zero-defect paver blocks is entirely possible by calibrating your machinery and mix design. Here is the professional methodology to fix pinholes:

1. Optimize Your Vibration Frequency and Amplitude
The single most important mechanical factor in releasing trapped air is vibration. If the amplitude is too weak or the duration too short, the air never reaches the surface.

The Equipment Advantage: To get a flawless finish, the quality of your vibrating table matters immensely. For instance, using a heavy-duty 10x3 vibrator table designed with custom perforations across the surface ensures that the vibration energy is distributed perfectly. This prevents "dead spots" and guarantees that every single block receives optimal compaction.

Pro Tip on Timing: Even with a top-tier table, timing is everything. Ensure you are vibrating the top color layer for at least 15 to 20 seconds. However, over-vibration can be just as bad—if vibrated too long, the heavier aggregates will sink to the bottom, causing segregation and bringing excess water (bleeding) to the surface.

2. Master Your Rheology with PCE Superplasticizers
Your concrete mix might simply be too stiff. If the mix has a low slump (too dry), it loses its flowability. A stiff mix resists the vibration process, acting like a dense sludge that fiercely holds onto air pockets.

Do Not Just Add Water: The amateur mistake is to flood the mix with water. While this makes it flowable, it drastically ruins the water-cement ratio, resulting in weak, brittle pavers that suffer from shrinkage cracks and severe efflorescence.

The Admixture Solution: Instead, rely on modern Polycarboxylate Ether (PCE) superplasticizers. These high-range water reducers disperse cement particles electrostatically, dramatically increasing the slump and flowability without adding a single drop of extra water. This allows the mix to flow like honey into every corner of the mould, letting air bubbles slip out effortlessly.

3. Implement Strict Mould Hygiene and Release Oil Control
The surface of your paver block will only ever be as smooth as the rubber mould it was poured into.

If your rubber moulds are not cleaned properly, microscopic cement dust and debris will build up on the walls. This creates a rough, friction-heavy surface that "grabs" air bubbles against the wall before they can vibrate upward.

Watch your release agents: If you use a mould release oil, you must apply it in an ultra-thin, microscopic layer (preferably atomized via spray). Puddles of excess oil pooling in the bottom of the mould will literally displace the cement paste and cause massive surface bubbles. Read our comprehensive analysis: Do You Need Release Oil for Rubber Paver Moulds?.

Sand Moisture & Aggregate Gradation: The particle size distribution of sand plays an undercover role in bubble entrapment. If the sand has high silt content (above 4%), it absorbs water aggressively, reducing the effective water available for lubrication. This increases internal friction, locking the air pockets in place. Ensure you perform a sand sediment test. Keep fine sand moisture monitored daily to adjust the water added in the planetary mixer accordingly. Using graded 6mm to 10mm aggregates helps reduce void spaces, encouraging air bubbles to channel upwards and escape cleanly during the 20-second vibratory cycle.

Frequently Asked Questions on Air Bubbles

1. Why do my concrete paver blocks have air bubbles?

Air bubbles are formed because trapped air in the concrete mix is unable to escape during vibration. This is often due to a stiff mix, insufficient vibration time, or dirty moulds trapping the air against the surface.

2. How can I prevent pinholes on my paver surface?

To prevent pinholes, use a high-frequency vibrating table (like a 10x3 perforated model), apply a quality superplasticizer to increase the slump of the color mix, and ensure rubber moulds are perfectly clean before pouring.

3. Does vibrating longer fix air bubbles?

Not necessarily. Vibrating too long can cause the aggregates to segregate from the cement paste, weakening the block and causing bleeding. It's better to improve the flow of the mix with admixtures and use an optimal vibration time of 15-30 seconds.

4. Can too much release oil cause bubbles?

Yes. If excess mould release oil puddles at the bottom of the rubber mould, it will block the cement paste from reaching the mould surface, directly resulting in large surface craters when the block cures.

5. What type of vibrating table is best for wet cast pavers?

A heavy-duty vibrating table with balanced eccentric motors (e.g., 2 HP to 3 HP) and a perforated top plate is ideal, as it distributes high-frequency vibrations evenly to release all entrapped air.

The Bottom Line

Achieving a perfectly smooth paver block requires a balance of chemistry and mechanics. By utilizing a high-quality, evenly distributed 10x3 vibrating table, properly dosing your chemical admixtures, and maintaining rigorous mould hygiene, you can eliminate surface bubbles for good.

Quality pavers start with quality processes. By controlling your vibration, mix, and moulds, you ensure every block that leaves your facility is perfectly smooth, highly durable, and ready to pave the way to success.

Balaji Construction Machines & Spares Team

Written & Reviewed by Balaji Construction Machines & Spares Team

The engineering and technical expert team at Balaji Construction Machines & Spares. With over 19 years of hands-on expertise engineering industrial wet cast brick, block, and concrete planetary mixing machinery, our team is a trusted authority in concrete production optimization.